In a climate like Dubai’s, where grass and any kind of plantation dies within days, it requires something resilient. Artificial grass is the best option to have a natural look for your home and not worrying about it drying up. Artificial grass is an amazing and better substitute for a natural grass lawn. Compared to the real grass, this turf lasts year-round. They don’t entertain the fall season at all. But installing these is a challenge in itself. That’s where
Green Wall comes in. They have provided a guide that is so good, thorough, and showcases everything about artificial grass and its installation. So, without any further delay, let’s get into it.
Artificial Grass Installation — A Complete DIY Guide For Homeowners!
The trend of having fake grass lawns in Dubai homes has become less of a lifestyle choice and more of a necessity. These turfs don’t require any noticeable care or regular watering. Despite all these things, the thing that matters most is the installation methods, the shortcomings of these methods, and the care and maintenance tips. In this guide, all of these things are going to be discussed in thorough detail.
The Climate Call. Why Time Matters In Installation?
The right time is not a myth, especially not here. Dubai’s hot summers reach up to a scorching 45°. This heat can cause various problems, like the sealant drying out too quickly, resulting in weaker adherence. This can be avoided easily with a weather-appropriate installation. Choose anytime from October to March for a durable installation. The weather is pleasant, and the turf’s grip would be sturdier.
Installation Method & Required Materials
Time to address the elephant in the room. The installation. Its pitfalls and every other thing included. Let’s start with the most important, the installation.
-
Prepare Your Toolkit
Double-check all the tools that we mentioned here. Check your laser level and your safety gear. Personal safety exceeds the completion of your tools. Your safety gear includes transparent safety goggles, industrial gloves, and knee protectors. Here is the list of some basic tools that are used in a flawless installation of fake turf.
- Measuring Tape
- Laser Level
- Turf Cutter
- Rotitlier
- Steel Rake
- Heavy Roller
- Sprinkling Hose
- Seam Tape
- Turf Glue
- Seam Roller
- Galvanized U-Pins Or Shank Nails
This is a well-categorized list of tools and equipment that will be used in the process. Now, let’s get started.
-
Planning & Assessing
Assess the area where the turd has to be laid. Measure the total area and leave a margin of 10%. It means you have to order rolls that have 10% more turf than required. Check the drainage system, as it is essential. Keep a 1-2% slope towards the drainage holes for better irrigation. The slope makes sure that the water doesn’t pool on the surface or even beneath the surface. After that, plan the perfect time for a better and durable installation.
-
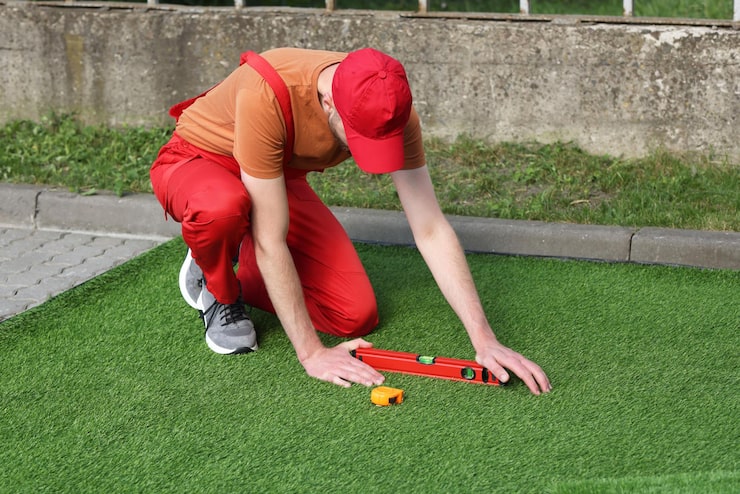
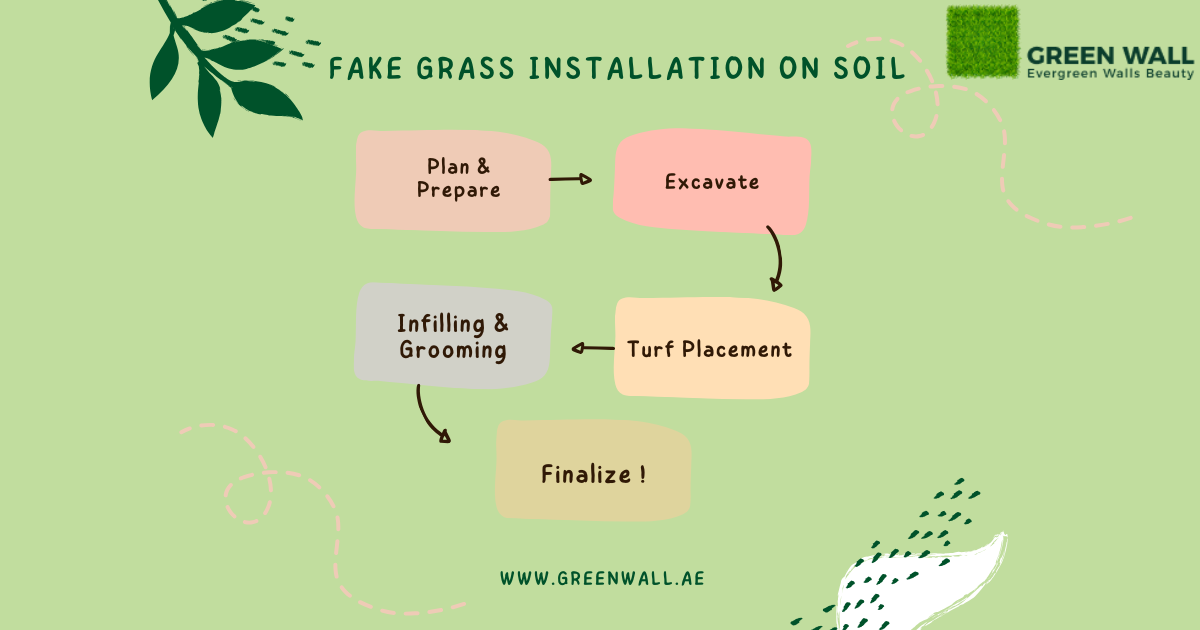
Standard Installation (On soil)
This is the most common area to install fake grass. Soil holds everything better than any other surface.
- Excavation: This includes the preparation of the garden. Removing the old turf (if any), weeds, or wild vegetation. Avoid low pockets, but a 1-2% slope is doable and recommended!
- Weed Barrier: Normally, a geotextile fabric is used as a weed barrier. Here’s the thing: all weed barriers are made of geotextiles, but not all geotextiles are qualified as weed barriers. Overlap this layer for about 100-150mm and pin it down every 1 meter.
- Sub-Base: Pour 50-75mm of aggregate in different lifts. Now, mist the aggregate and compact it 90-95% with a weighted plate compactor.
- Bedding & Shock Pad: Add 10-15mm of crushed stone over the sub-base. Repeat the misting and compacting process. Additionally, a shock-absorbent layer or pad is also added in case of playgrounds.
- Place The Turf: Before pacing the turf on the prepared area, let it unroll and relax. It gets rid of the wrinkles and guarantees a smooth application. Now, cut the turf with the turf cutter, leaving 50-75mm excess border on each side.
-
Sealing The Seams
Before rushing in with the glue, try dry placing. It’s used to check whether both parts fit together or not. Once you have confirmed that, place the sealing tape underneath the turf and apply the turf sealant thoroughly over that tape. After that, carefully place the turf on it and secure it in place with something heavy like sandbags or a seam roller. Sometimes, an S-cut is more beneficial than a straight cut. A straight cut shows easily, but this is not the case with an S-cut.
-
Fix The Perimeter
The turf is in place. Now, you have to secure it. Use galvanized u-pins to hold it securely. Hammer down these pins every 100-150mm. Apply more pins around the edges and the corners. Leave an adequate expansion gap around the edges. Now, cut the extra turf neatly with the turf cutter.
-
Pour The Infill & Groom
Infill is the most important part of the whole process. Make sure you’ve a substantial amount. Typically, 20kg/square meter is more than enough. For landscaping, silica infill is the best. Now, start pouring the infill into the turf along with the broom. The broom would keep the infills in place and also help lift the fibers. Keep on doing this until the fibers are fully straightened and only 8-13mm of their tip is showing.
The process is completed. The adhesive dries out in a few hours. It’s generally recommended to avoid traffic on this turf for at least 3 days.
This was a thorough process of installing these fake grass turfs on the soil. Now, let’s talk about the other type of grass turf installation.
-
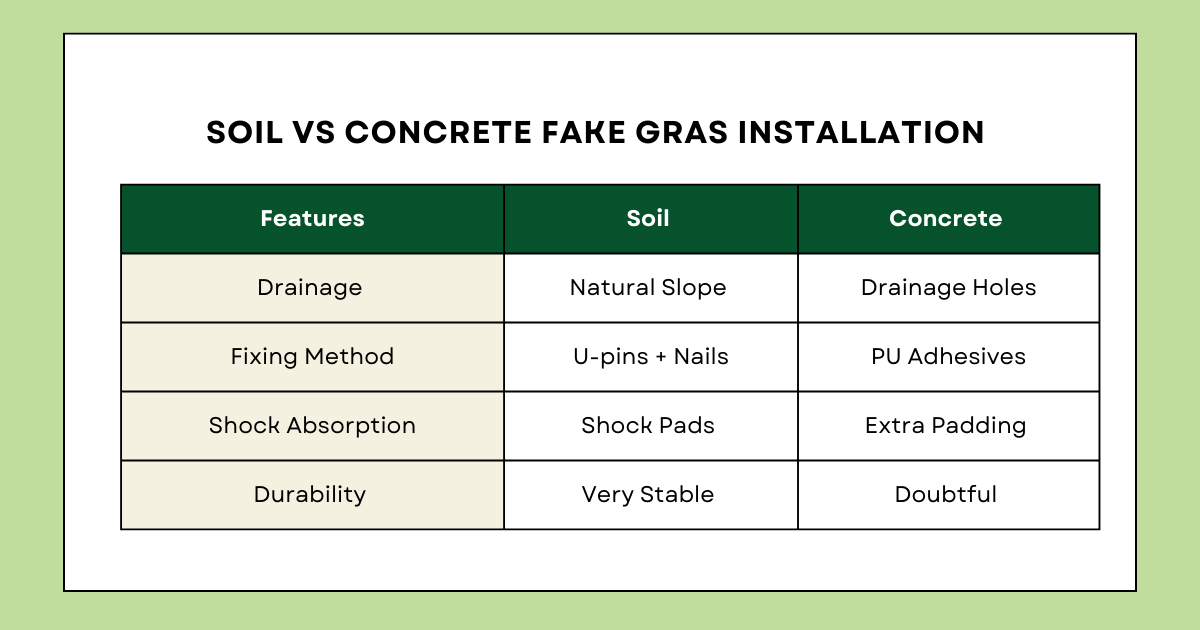
Rooftop Or Concrete Installation
There are two types of this installation. Either you can have a floating installation that is installed directly on the top of the infill, leaving weep gaps for water drainage. Always remember to install a water drainage system under the turf. The second method is to fix the turf permanently using polyurethane (PU) adhesives.
Common Pitfalls Of Turf Installation!
In the above paragraphs, we discussed both types of installation of artificial grass turfs. Now, we are going to debate the common mistakes and pitfalls before, during, and after the installation.
- Using the wrong aggregate: Use only an angular cut aggregate of pea gravel or stone.
- Not securing the edges: This results in awkward buckling of edges, which may lead to unfortunate tripping accidents.
- No slope: Slope is extremely necessary. This is not the real soil that would absorb water. Instead, water pools, and eventually it smells bad. Always have at least a 1-2% slope towards the drainage holes.
- Inefficient seam sealing: Either the seam is not properly sealed, or the turf overlaps each other. It gives a rather unclean, messy, and unsightly look. Another cause can be opting for affordable (cheap) adhesives instead of high-quality polyurethane glue.
- Insufficient compaction or infilling: If the soil is not compact enough, it dips almost instantly after the first watering during the infilling. The soil absorbs water, it dips, and it wrinkles the turf. Another factor is either overfilling or underfilling the infill. Overfilling causes an even more plasticy and artificial look, while underfilling can cause excess heat absorption and a matte look. Both of these situations are uncomfortable and unsightly.
- Ignoring the expansion gap and drainage, Turf tends to buckle against the hard edges. An expansion gap of 10-15mm on each side to avoid this discomfort. Another major but often overlooked factor is poor or no grainage at all. Drainage is necessary at both soil and concrete installations. But, it becomes crucial on concrete, because concrete is not absorbent, so the water pools on the surface.
How To Maintain These Turfs — An Overview!
As we talked about earlier that these mats don’t require daily or sometimes even weekly cleaning. But still, they need maintenance, which is quite easy.
- Weekly – Monthly
Re-lift the fibers using a stiff brush or a power broom in the areas mostly used. Use a leaf blower to blast the turf with pressurized air. This would rid the turf of dirt, fallen leaves, and other debris.
- Quarterly
Check thoroughly every three months. Examine the seams and edges. If the seams are loose, reapply some of the adhesive and seal them again. Pin the edges if the nails are coming loose.
The Real World Masterminds in the Artificial Grass Field.
Almost there! Now, we are going to talk about the giants in the field. Each one of them is a prestigious company with thousands of successful projects all over Dubai, Abu Dhabi, and the UAE. The list is graced by Lushloom, Novafloor, Dubaflooring, MySofa, and OmniHome. They’re considered the top-tier artificial grass turf suppliers in Dubai.
The Overall Essence!
There you have it. An all-inclusive guide about installing fake grass in Dubai gardens. We covered absolutely everything that could come in handy during the process. We even discussed the right time to install the turf. After that, we went into every minor detail about the installation process. Starting from the preparation of the garden floor to finalizing the look. We also debated about the two types of turf installation: on soil and on concrete. We stated the factors that affected both of these.